Understanding RSVPs and Registration
RSVP vs. Registration:
RSVP refers to confirming attendance to an event, usually with a simple "yes" or "no" response.
Registration, on the other hand, typically involves providing additional details or preferences beyond mere attendance confirmation.
Inviting Guests
1. Access Upcoming Event Page: Log in to your dashboard and navigate to the "Upcoming Experiences" section.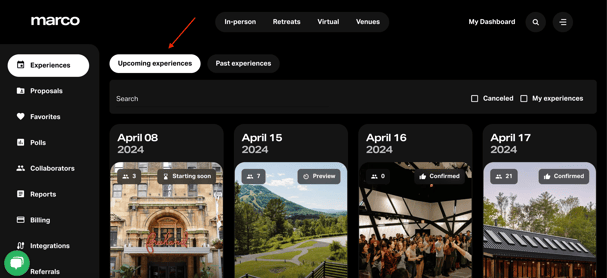
2. Click on Guests: Within the details of the specific event you're managing, locate and click on the "Guests" button.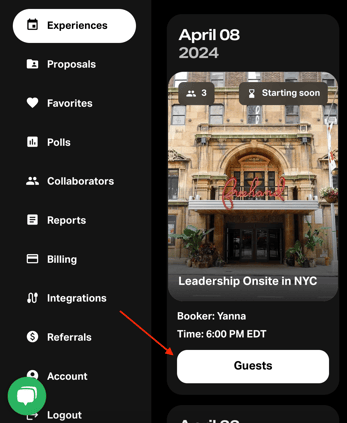
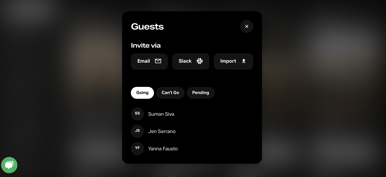
3. Choose Invitation Method: Once prompted, select your preferred method for inviting guests. You can choose to invite them through Slack or via email.
4. Enter Guest Information: Depending on the chosen method, input the necessary guest information, such as email addresses or Slack handles, to send out the invitations.
5. Email communication & calendar invite: Guests will receive an email invitation to your event and will be promted to RSVP through the landing page (linked in the invite). Once they RSVP "yes" they will receive a confirmation and calendar invite to the event.
Managing RSVPs and Guest List:
1. View Guest List: After sending out invitations, you can view the guest list by returning to the "Guests" section within the event details.
2. Track RSVPs: Monitor the responses as they come in. Guests may RSVP directly through the invitation link provided in the email or Slack message.
3. Update Guest List: As guests RSVP, their responses will be automatically updated in your dashboard. You can also manually update the guest list if needed.
4. Make Edits: If necessary, guests can make edits to their RSVP response by clicking back into the landing page and adjusting their response.
Managing Registration Details:
1. Determine Registration Requirements: Collaborate with our customer support team to identify the necessary registration details. Consider factors such as dietary restrictions, transportation needs, or preferences for breakout sessions.
2. Configure Registration Questions: Contact your customer support team to discuss the specific questions and details you want to collect from registrants.
3. Use Google Sheet for Tracking: Our customer support team will help set up a google sheet for you to track responses and manage the registration list.
4. Provide Registration Link: Re-share the landing page link with your invitees through email, Slack, or any other preferred communication channel.
5. Monitor Registrations: Regularly check the Google Sheet to monitor incoming registrations.